


Build Your Own DIY Outdoor Kitchen
Whether you’re a seasoned DIY enthusiast or a beginner keen to learn carpentry, this guide will help you plan and construct your very own outdoor kitchen.
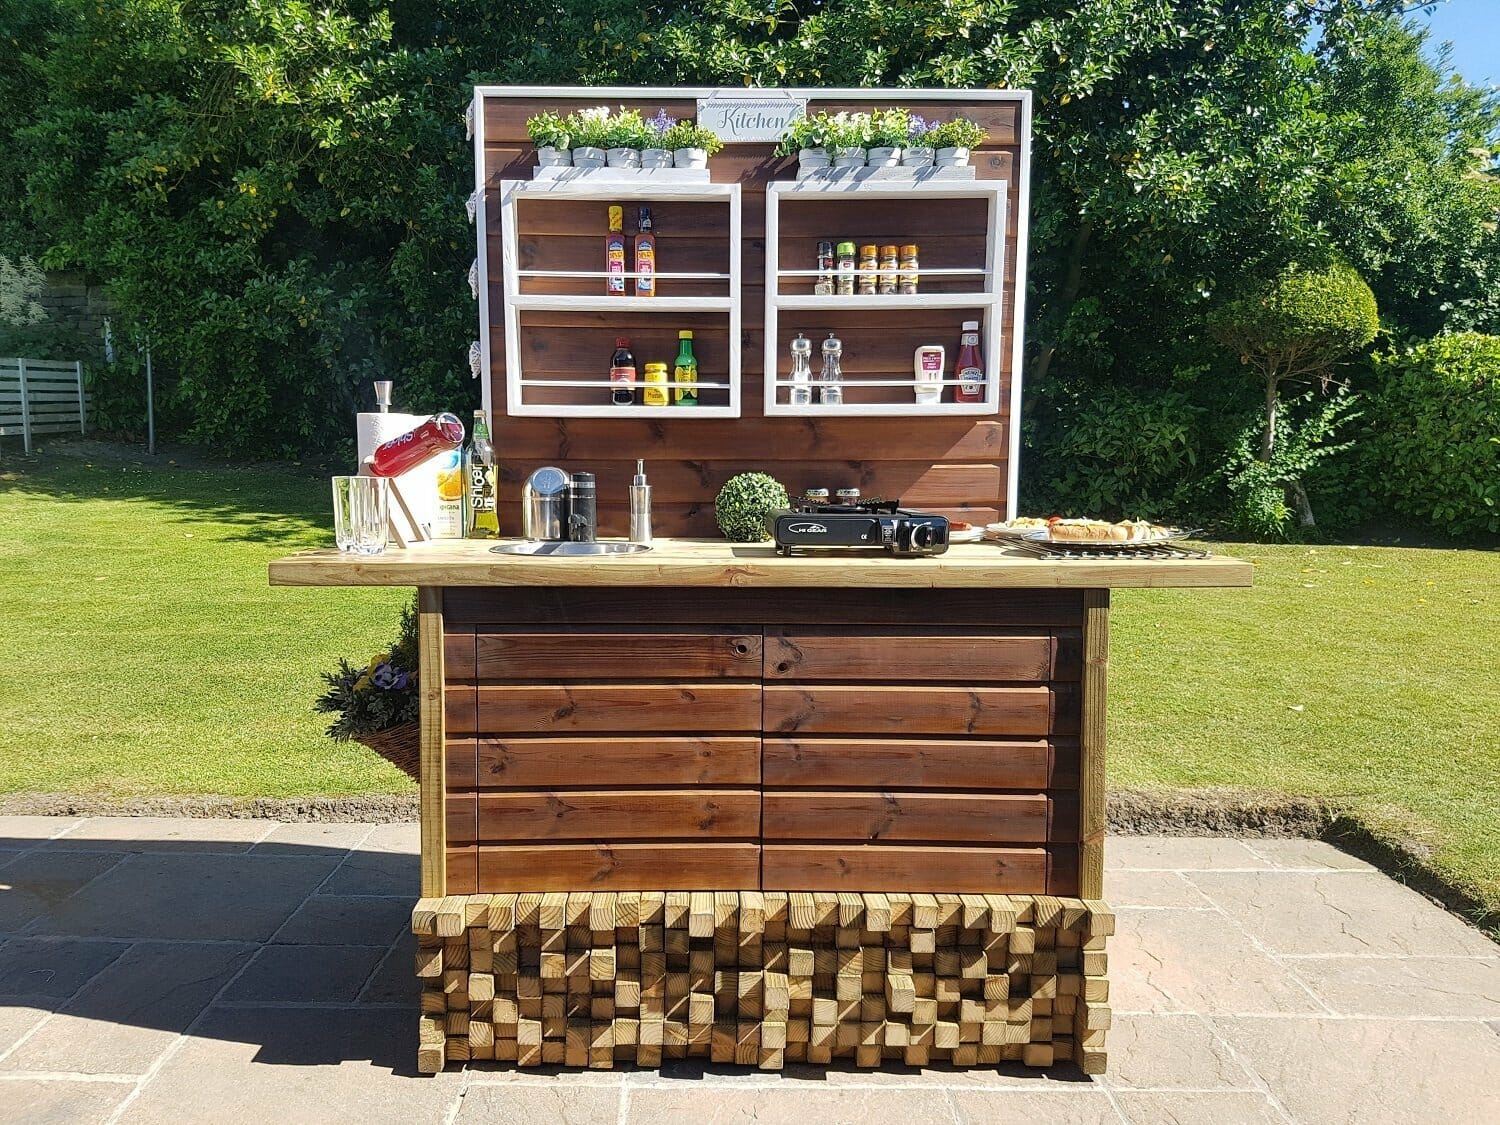
With summer in full swing across the UK, it’s the perfect time to add an outdoor kitchen to your outdoor living space or patio. Back in 2019, we teamed up with BBC Carpenter, Tibby Singh to show us how anyone can build a DIY outdoor kitchen. We’re excited to have him back to share his knowledge and experience in this updated guide for 2026.
So, without further ado, let’s get started. Whether you’re a seasoned DIY enthusiast or a beginner keen to learn carpentry, this guide will help you plan and construct your very own outdoor kitchen.
Preparation, Tools, and Materials
Before you get started, make sure you have the right materials and tools to get the job done. Here’s a list of what you’ll need to build your DIY outdoor kitchen:
▼ Plan Your Design
- Sketch a detailed layout of your outdoor kitchen. Keep space, style, size and storage in mind.
- Look for inspiration from current design trends. Think modern minimalism with a touch of rustic charm.
▼ Safety First
- Wear gloves and other appropriate personal protective equipment (PPE), such as dust masks, ear defenders, safety boots, and safety glasses.
- Work in a well-ventilated area and store tools and materials away from your workspace to avoid accidents.
▼ Required Materials
- Breathable membrane
- Cladding
- Plywood (6mm, 12mm, and 18mm)
- Roof laths
- Screws (various sizes)
- Sink (or alternative, such as a repurposed bowl)
- Stains and paints (e.g. Clear Decking Oil, Wood Stain, White Paint)
- Stainless Steel Ring Shank Nails
- Timber (various sizes including 2x2, 3x2, 4x1, and 4x2 inches)
▼ Optional Materials
- Soft-close drawer runners
- Soft-close inlay cabinet hinges
- Staples
▼ Essential Tools
- Clamps (various sizes)
- Pencil and measuring tools
- Drill
- Hammer
- Jig saw
- Router
- Saw or Mitre Saw
- Square
- Paint brushes
▼ Gorilla Products
- Gorilla Glue Original
- Gorilla Tape
- Gorilla Grab Adhesive
- Gorilla Wood Glue
- Gorilla Mould Resistant Sealant (Clear)
Build Your Very Own Outdoor Kitchen in 11 Steps
Step 1: Get Your Outdoor Kitchen Structure Right
Cut 3x2-inch lumber to the required lengths for your back frame and secure with 4-inch screws.

Build a cupboard frame using 2x2-inch lumber, leaving the front open. For maximum strength, ensure all lumber is spaced between 400 and 600mm apart.

Pro tip: Use pressure-treated wood for a highly durable outdoor kitchen that resists rot and seasonal temperature changes.
Step 2: Line the Cupboard of Your Outdoor Kitchen
Cut and fix 12mm plywood to the inside of the wood frame, lining all five sides except the front.

Step 3: Keep It Breathing
Wrap the entire timber frame in a breathable membrane to prevent interstitial condensation.
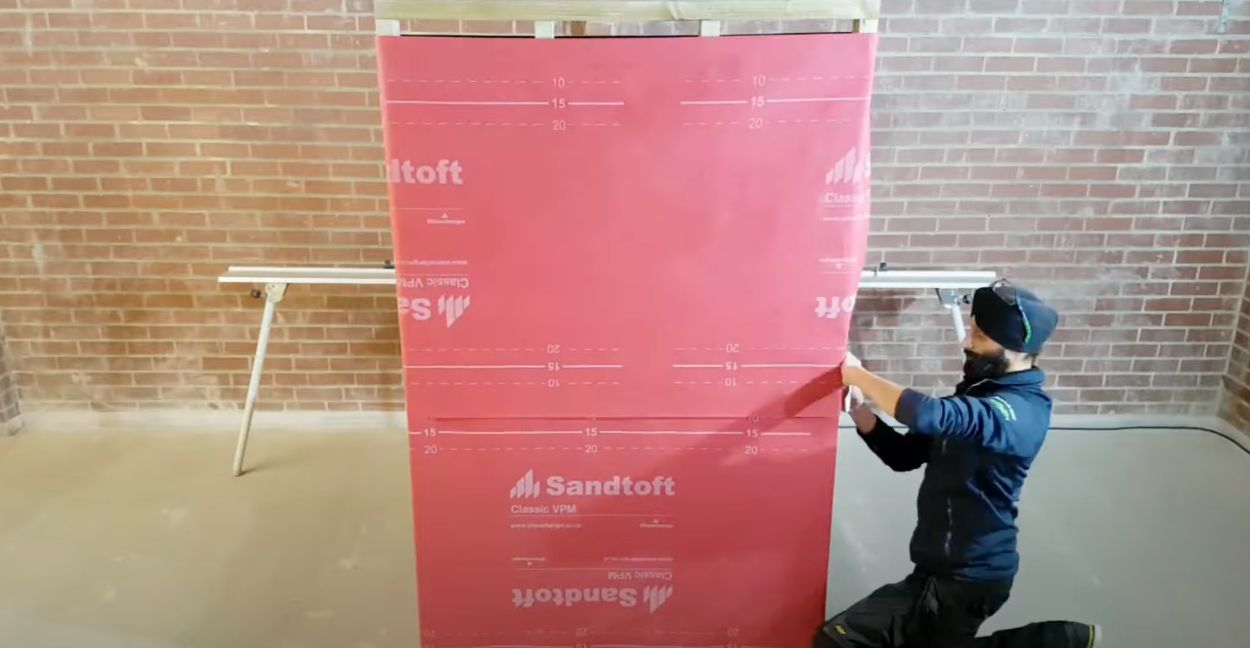
Temporarily secure the membrane with Gorilla Tape before stapling it neatly to the frame.

Step 4: Ensure Air Circulation with Roof Laths
Screw 2x1-inch roof laths onto the top of your membrane to create a cavity that allows air circulation and water drainage.

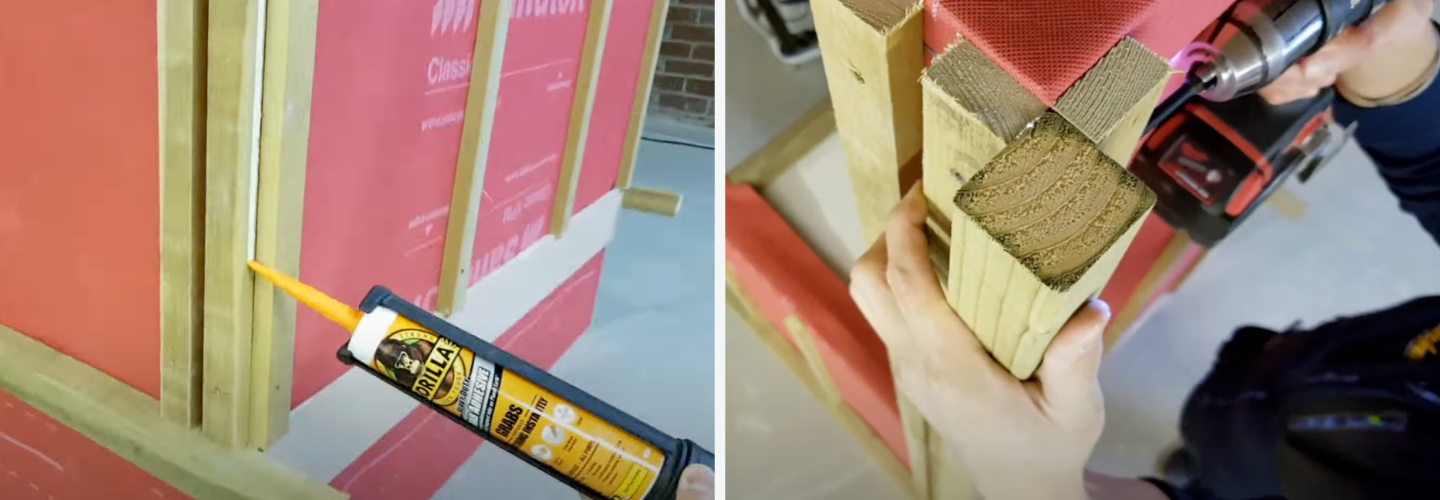
Ensure that the frame remains rigid by adding a square lathe support to the corner areas. Use Gorilla Grab Adhesive and screws to hold it in place.
Step 5: Fix External Cladding
Cut and start fixing your cladding to the roof laths. Start at the bottom and work your way up, overlapping each piece to conceal nail heads and maintain a clean aesthetic.

Step 6: Create Drawer and Shelf Units for Your Outdoor Kitchen
1. Drawer Assembly
Measure the internal dimensions of your cupboard space and cut five pieces of 18mm plywood to size.
Your drawer will need - 1 x bottom board, 2 x sideboards, 2 x front and back boards.Use a wood router to cut a shallow groove for a cleaner finish and easier assembly.
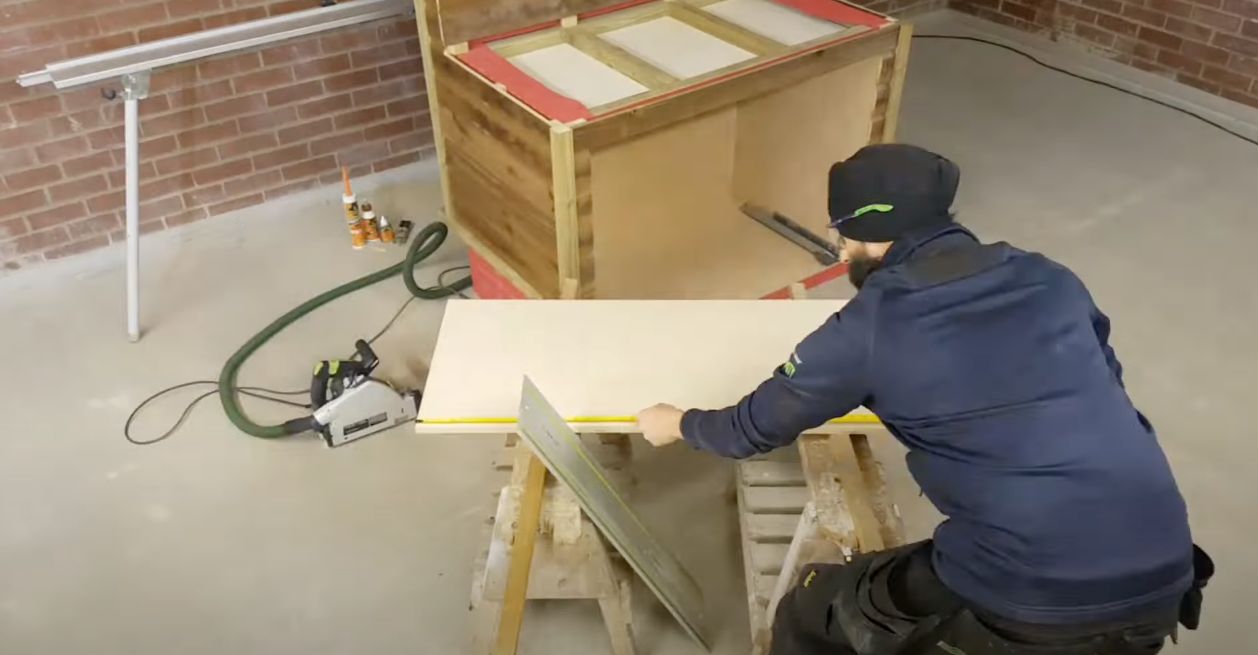
Then, bond the pieces together using Gorilla Wood Glue and secure it with screws.

Optionally, you can also install soft-close drawer runners to allow for smooth opening and closing.

2. Shelf Construction
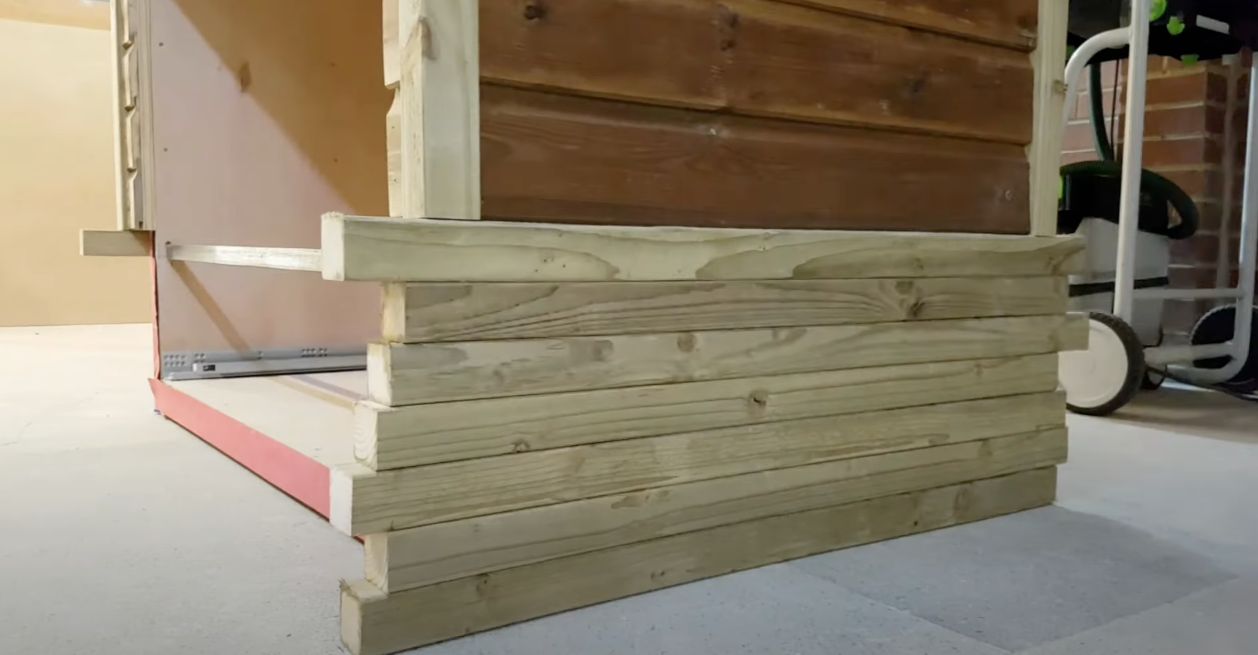
Add a metal rod or wooden plank to the front of your cupboard, just above the top of your shelf. If you opt for wood, make sure it is cut to size and in line with the wood beam at the back of the cupboard.
Then, cut several 2x2-inch pieces of lumber to length. Add a bit of Gorilla Wood Glue to each piece and rest them on the front and back beams of your cupboard.
Press them against one another as you place them to ensure a good bond. Once dry, secure the shelf to the back beam and sides with screws or nails.

For an added effect, you can place additional timber laths at the front and back above the drawer level to create a stacked timber look.
Step 7: Build the Worktop
A solid counter space is great for outdoor food prep, cooking while you socialise with friends, and displaying side dishes and snacks. Here’s how to build one for your outdoor kitchen.
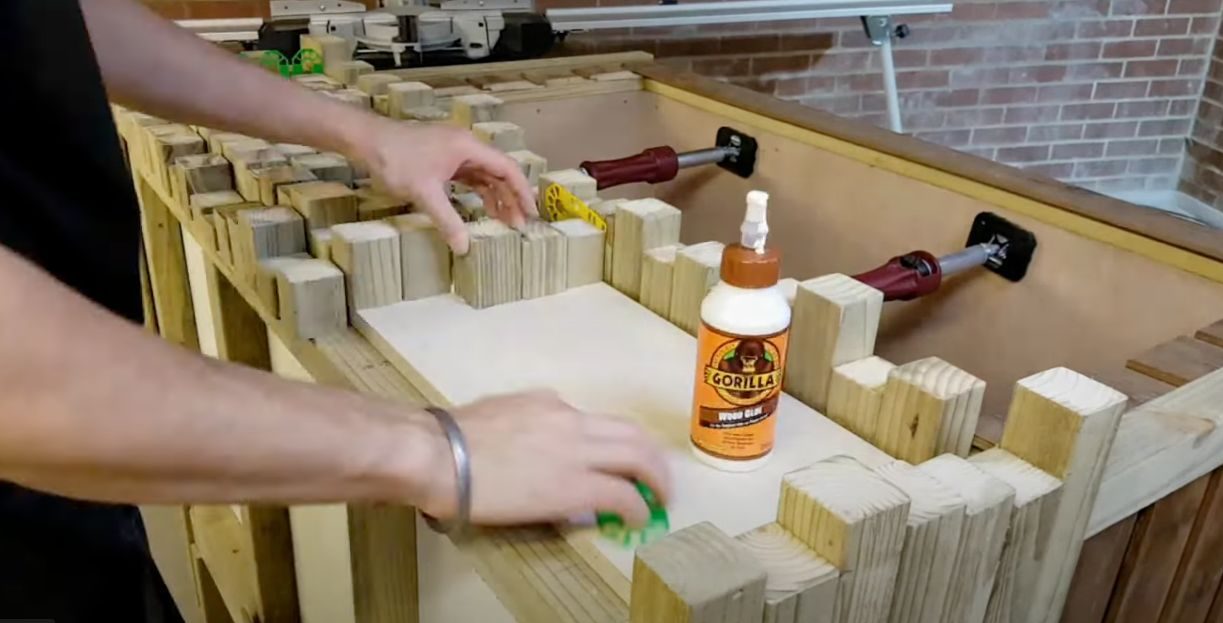
Start by cutting 4x2-inch lumber to the length of your kitchen unit. Then, glue them together with Gorilla Wood Glue. Apply the wood glue in a zig-zag pattern along each piece and press them together.

Finally, clamp the glued wood pieces and wait for them to cure fully. Then, clamp two planks on each end of the glued wooden beams to make sure your counter is flat. Once dry, secure it to the frame using Gorilla Wood Glue and screws.

Step 8: Install a Sink
1. Create your sink
For easier cleaning and food prep, you can add a sink to your outdoor kitchen countertop.Use a purchased sink or make your own (a repurposed old fruit bowl will do the trick).
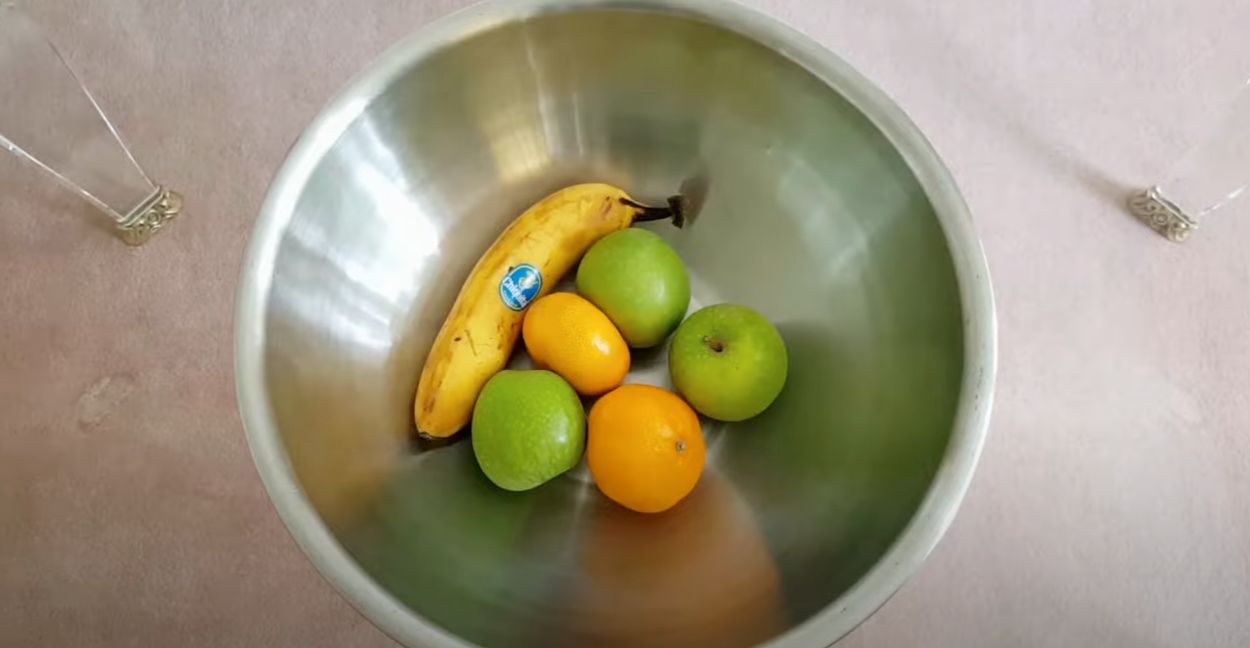
Next, mark the centre of the bowl and drill a hole for the drain.

2. Install your sink on your countertop
Measure the area of the bowl on your wooden countertop. If your bowl has a lip or edge, consider this when measuring holes to be cut. Measure the diameter of the bowl and divide it by two. Then, measure the lip diameter and deduct that number. For example, if your bowl is 300 mm across and has a lip of 3mm. You’ll need to cut a 147 mm diameter circle in your worktop. (300 mm/2)-3 mm = 147 mm.

Create a DIY compass drawing tool to outline a perfect circle. Take a spare piece of wood, hammer a nail at one end and measure the diameter of your bowl. Then, drill a hole and insert a pencil through it.

Drill a small hole along the line, then use a jigsaw to cut out the sink shape.

Finally, secure your bowl and drain filter with Gorilla Mould Resistant Sealant (Clear) for a tight waterproof seal and sufficient overhang for stability.

Step 9: Set Up a Tap
Add running water to your outdoor kitchen with a rechargeable battery-powered tap. Drill a hole for the pipe to access a water bottle positioned below.

Attach the clear rubber hose to your battery-powered tap and feed it through the hole in your counter.

Make sure the tap is firmly attached to the countertop. To keep it in place, add a dot of Gorilla Glue Original.

Step 10: Install Cabinet Doors
1. Create your cabinet doors
To create the base of your cabinets, cut two pieces of 6 mm plywood. Then, glue the wooden cladding using Gorilla Grab Adhesive.
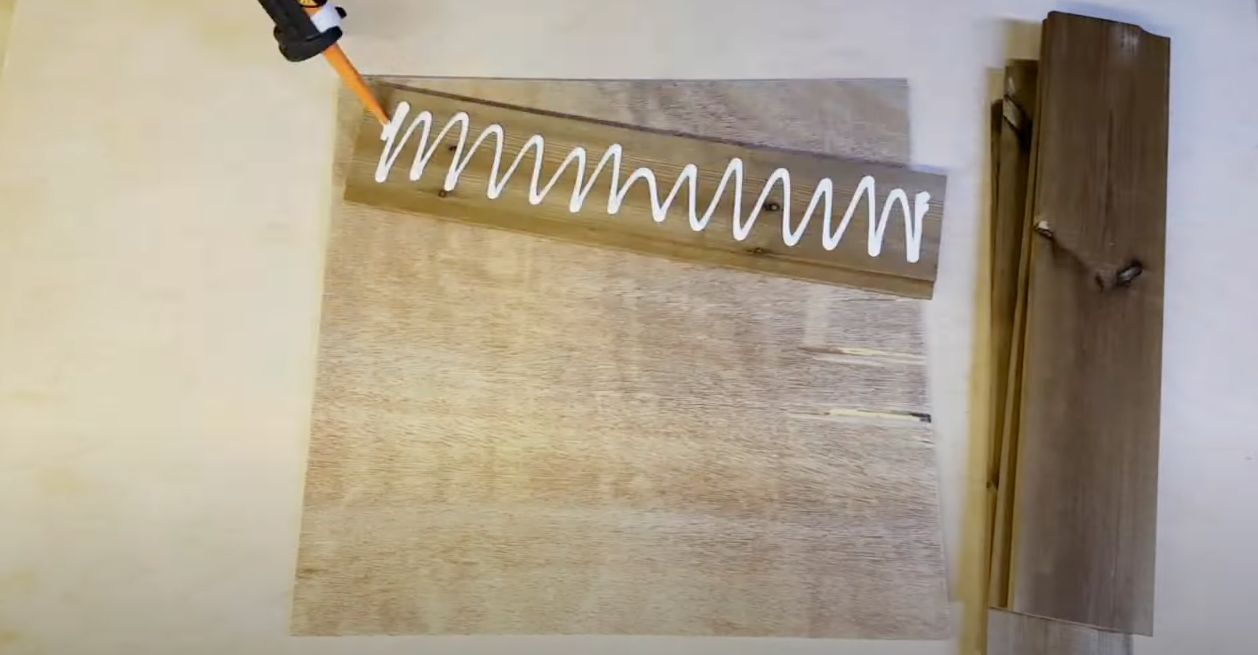
When measuring, remember to leave a 3mm gap around each door and keep the door thickness under 18mm to prevent it from sticking when closed. You can add handles or drill a small finger hole for easier opening and closing.

2. Add Inlay Cabinet Hinges
Inlay cabinet hinges will create a flush finish and allow your cabinet doors to open and close smoothly. Measure and drill holes into the plywood using a hinge boring bit. Then, secure your hinges in place with screws.
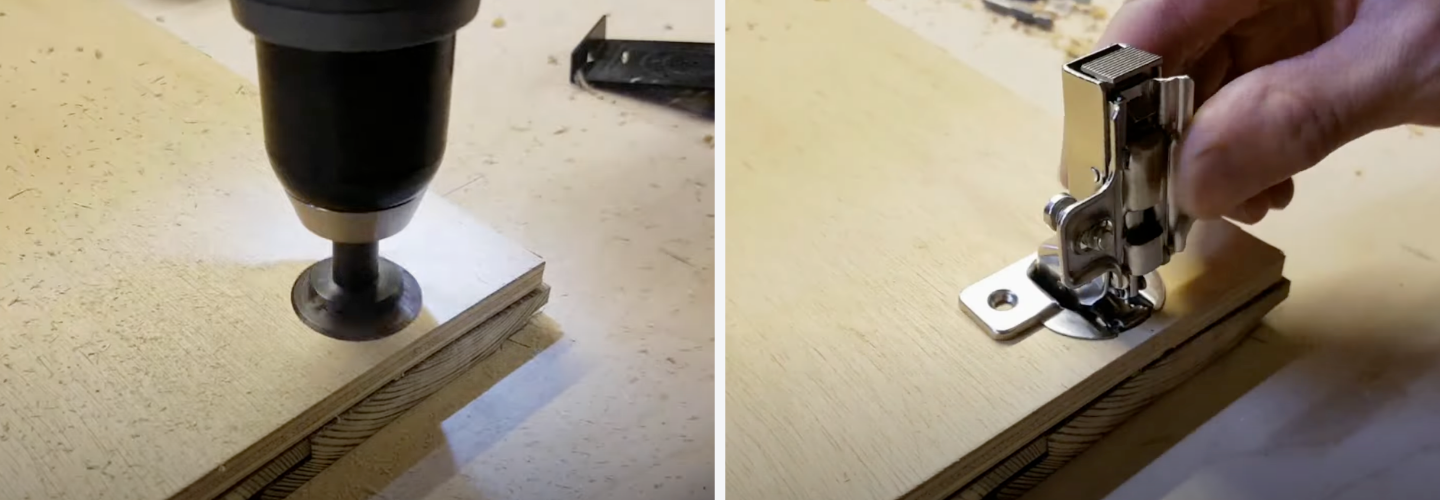
Finally, attach your cabinet doors to the inner part of your cabinet with screws and adjust the inlay cabinet hinge position for a flush fit by turning the small screw near the front with a screwdriver.

Step 11: Treat or Paint Your Wood
Because your outdoor kitchen will be exposed to the elements, you’ll need to add a protective coat of varnish or paint to protect the wooden surfaces and prevent warping over time.
Prepare for painting, varnishing, or staining by lightly sanding the surfaces and wiping them down with a damp cloth.
Once dried, apply your preferred stain, oil, or paint. Depending on your desired finish and durability, you may need to use more coats.
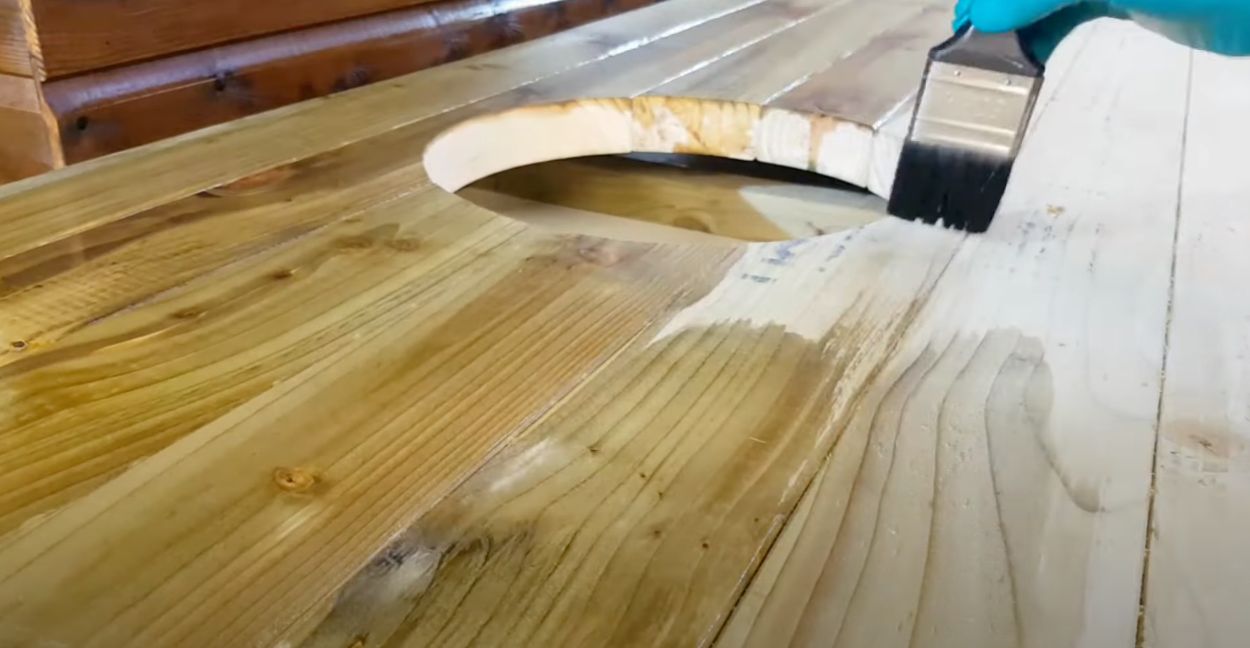
Pro tip: For a super glossy appearance, apply several coats of varnish and lightly sand between coats with fine-grit sandpaper.
Optional Extras For Your DIY Kitchen
Add Some Creative Finishing Touches
Cut various sizes of 2x2 noggins and glue them to the front face of the drawers and the back frame. This will create the illusion that a stack of lumber supports the structure.
Add a Spice Rack
Use five pieces of 4x1-inch timber cut to size and create your spice racks using Gorilla Wood Glue and screws to secure the pieces.
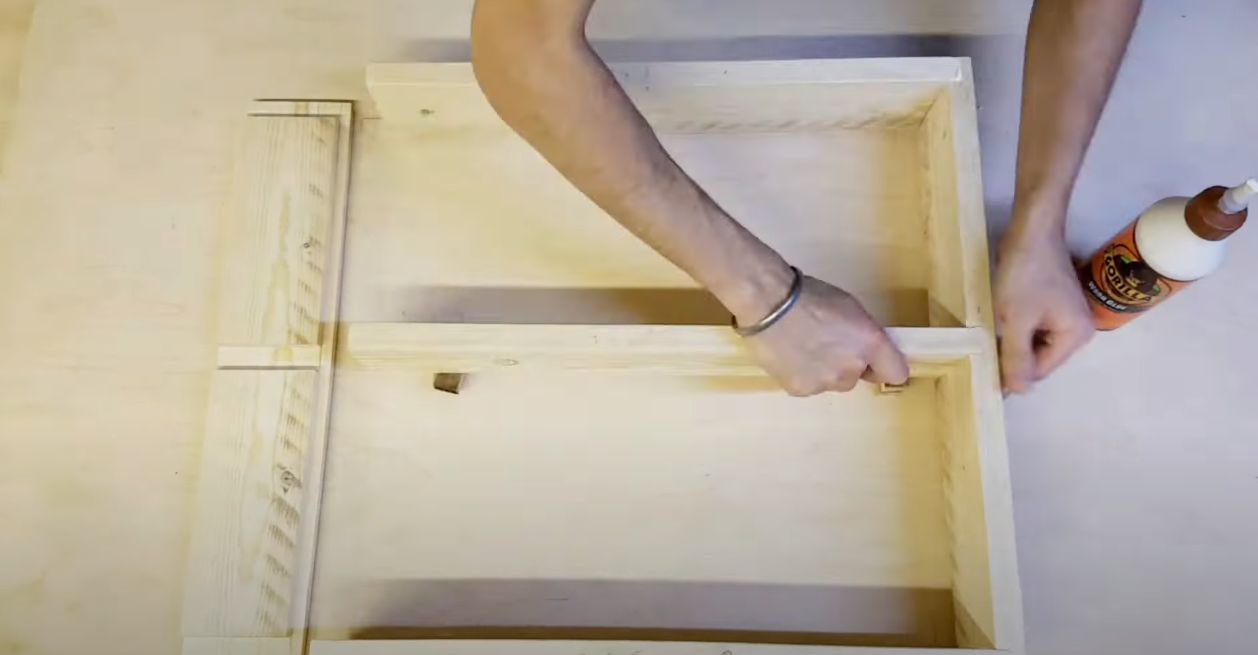
You can paint your spice racks to match the decor of your outdoor kitchen.
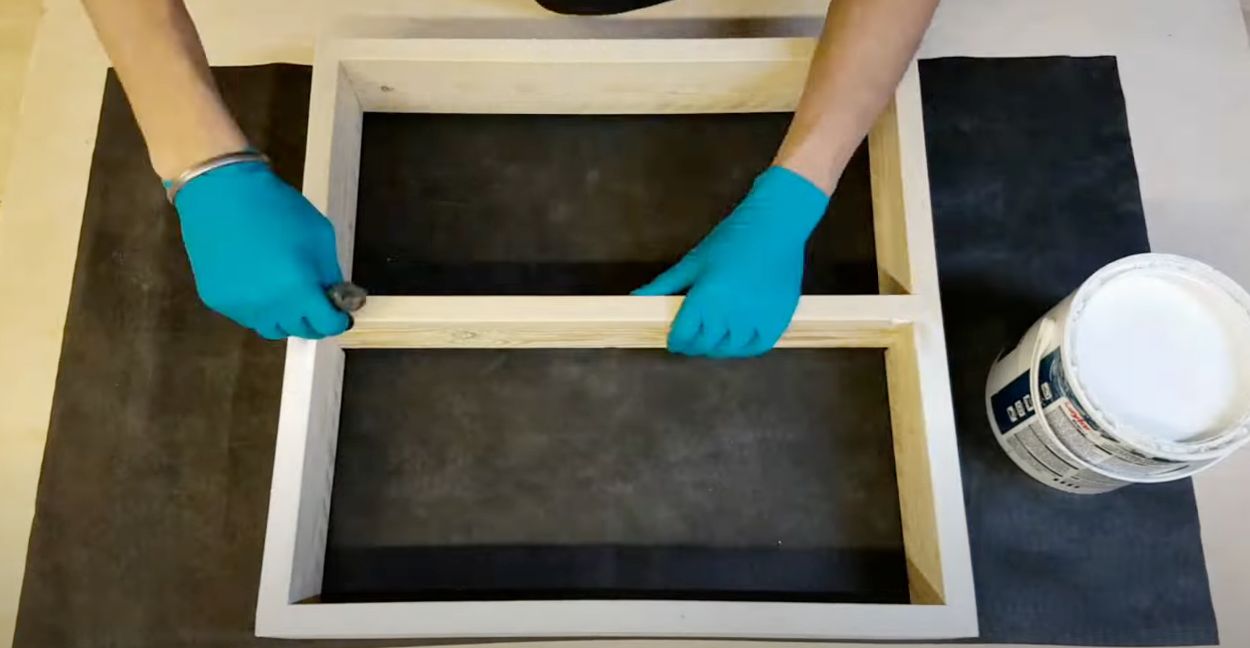
Finally, add shelf rails. Measure and drill 6mm holes with your drill on either side of the interior of your spice rack.Cut a 6mm dowel to be slightly longer than the diameter of the inside of your spice rack. For example, if your spice rack is 500MM, cut the dowels to 505-510MM.
Place a small drop of Gorilla Wood Glue on both ends. Insert one end and slightly bend the dowel to manoeuvre the other end in place.

For a seamless look, the spice racks should be the same size as the interior cupboard of your outdoor kitchen. This will allow for easy storage when they aren’t being used.

Add Castor Wheels
If you want to manoeuvre your outdoor kitchen, consider adding lockable heavy-duty wheels to the bottom. You can purchase a set of four castor wheels from your local hardware store. Make sure they can support the weight of your kitchen unit.
Gently turn your kitchen unit on its side and attach four square pieces of wood to each corner using Gorilla Grab Adhesive and four screws per block. Then, line up your castors on your wooden blocks. Mark and drill holes for each bracket hole and secure them tightly with screws.
Pro tip: For added grip, add a bit of wood glue to the holes before attaching your screws and don’t forget to seal any exposed wooden areas to prevent water damage and rot.
Time to Summer It Up
Your outdoor kitchen is now complete and ready to add flair to your outdoor dining experiences year-round. Because it’s moveable, you can place it alongside an outdoor pizza oven or gas grill on your patio to enhance your outdoor cooking and entertaining this summer. Visit the Gorilla Glue Project Ideas for more tips, tricks, and advice on DIY projects, adhesives, and household repairs.
quick decision guide
MY PROJECT INVOLVES...
BEST GORILLA PRODUCT
Frequently Asked
Questions
Need more info? You can find it here.
Gorilla products are widely stocked across the UK. You'll find our range at major retailers including Amazon, Tesco, B&Q, Wilko, Wickes, Homebase, Travis Perkins, Screwfix, Sainsbury's, Morrisons, Hobbycraft, Toolstation, Ryman, ASDA, Dunelm, and The Range. To find your nearest stockist, enter your postcode in our store finder. Please note that not all retailers stock the full Gorilla range — contact your local store to check availability.
If you're looking to stock Gorilla products in your business or use them in trade, our range is available through a number of wholesale distributors including Toolbank, Stax Trade Centres, Decco, TDUK, Wilsons, Home Hardware, and EFG Wholesale.
Each Gorilla product is engineered for specific applications. Check the product label for material compatibility, or visit our website's product selector tool to find the perfect adhesive, tape, or sealant for your project. Our range covers everything from indoor repairs to heavy-duty outdoor bonding.
Sign up to our newsletter at the bottom of this page to be the first to hear about new product launches, exclusive offers, and tips from the Gorilla team. You can also follow us on social media for the latest updates and inspiration.
Gorilla Tough, Every Time
Tackle any project with confidence. Explore our full Gorilla Tough
range to find the right fix for your next project.

For the toughest jobs on planet Earth®